-
Ingredients (yields 8 rolls)
- 675 g all purpose flour, plus more if needed and for dusting
- 450 ml water
- 1 tsp active dry yeast
- 1 tsp sugar
- 1/2 tbsp salt
- 3 tbsp avocado oil (or any other heat-resistant oil)
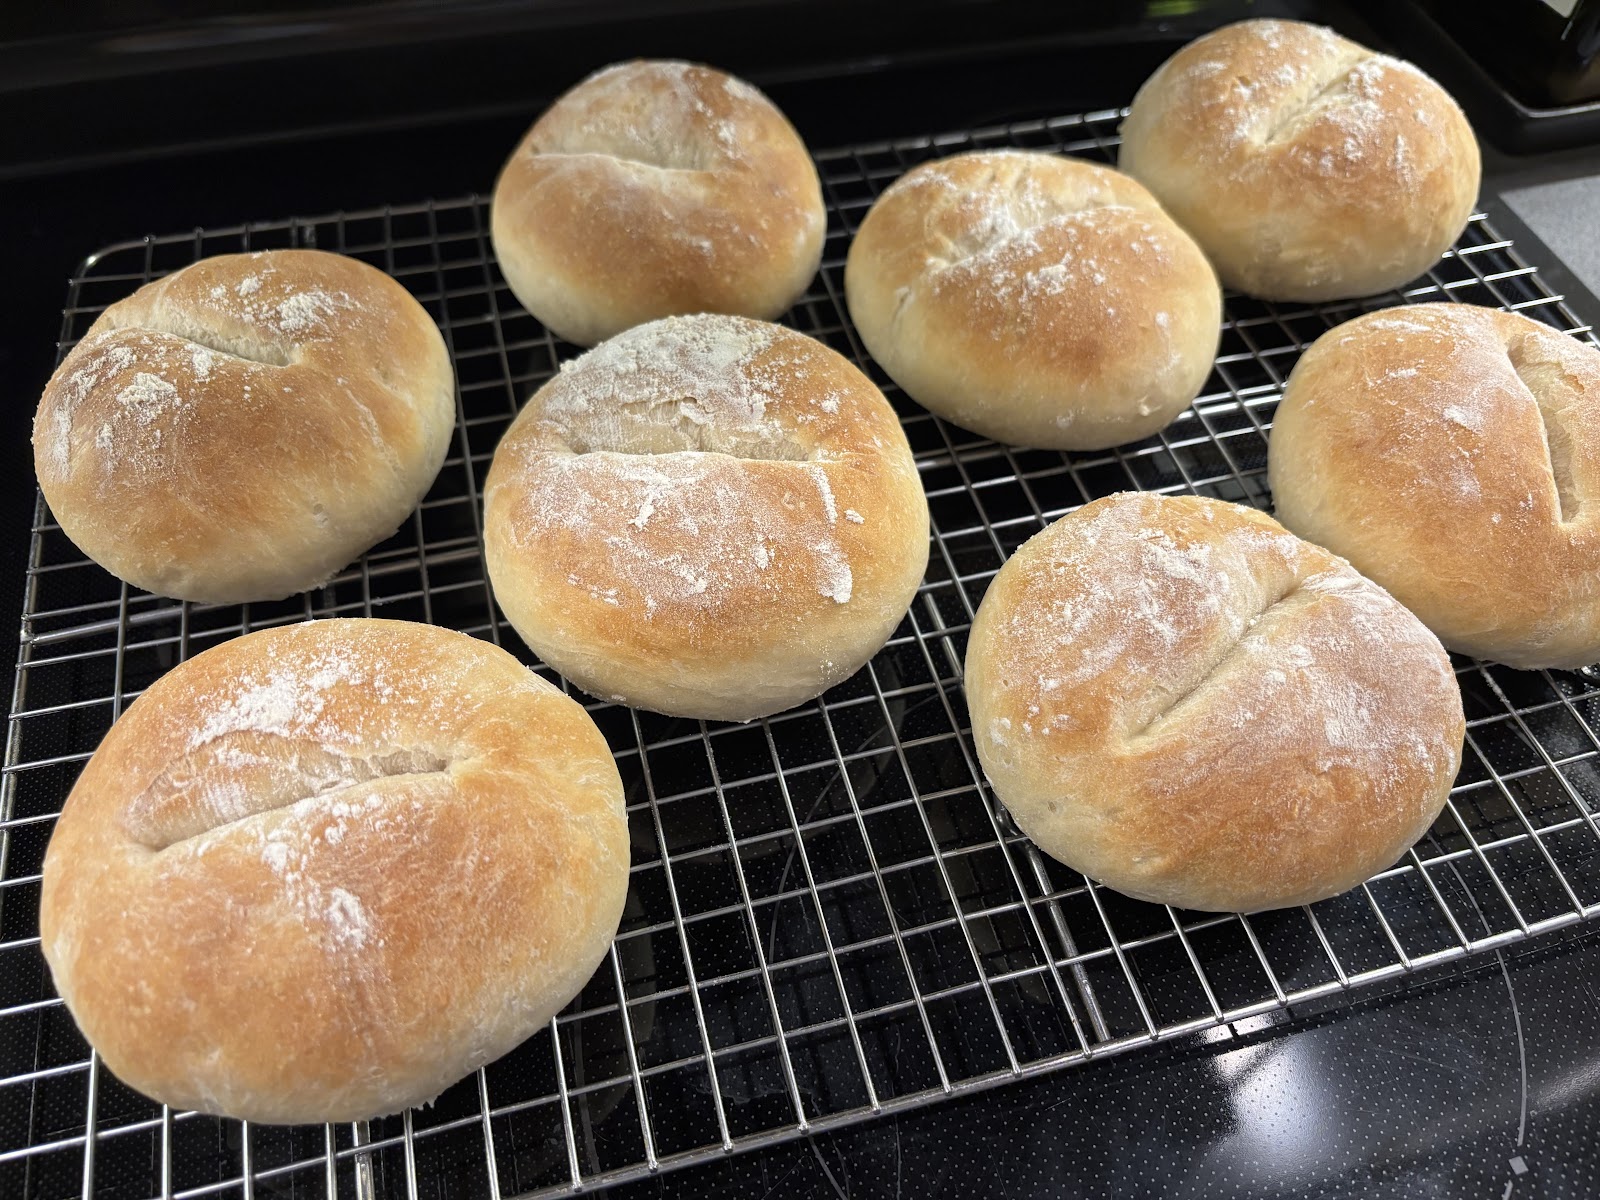
Polish Poznań rolls
This recipe attempts to recreate Polish Poznań rolls, a type of a roll that can be found in any Polish bakery. The whole baking process takes a while (on the order of 2.5 hours), but there is only about 30-40 minutes of active effort — the rest is needed for the dough to rise (multiple times). The actual proportion of flour and water may apparently depend on the local humidity, the flour, etc. I hope the amounts provided below will work for you; otherwise, you may need to experiment.
360 kcal per roll
Cooking time: XXX minutes
Instructions
- Sift 675 g of all purpose flour into a big bowl.
- Prepare 450 ml of warm water. It should be about 30 degrees C, or 90 degrees Fahrenheit (it's convenient to measure that with a meat thermometer). It should NOT be more than 40 degrees C, or 105 degrees Fahrenheit — in that case, it will kill the yeast.
- From the big bowl, take 4 tbsp of flour and put them into a medium sized bowl. Add 1 tsp dry active yeast, 1 tsp sugar, and 4 tbsp of warm water (also from the already measured amount). Mix well until the consistency of the mixture — known as a leaven — becomes a bit like that of Greek yogurt or heavy cream. Cover the bowl with a lid or a cloth and put it in a warm spot (for example, on top of a heater). Your goal is to keep the yeast around 30 degrees Celsius. Let it rest there for 30 minutes.
- After 30 minutes, the leaven should look foamy and have a risen profile. If it does not, it means the yeast is dead (for example, the water was too hot or it wasn't stored properly), and you have to start over.
- Scrape the leaven into the big bowl with flour, add 1/2 tbsp of salt, 3 tbsp of avocado oil, and the warm water (you will need to heat the water back to around 30 degrees Celsius, which you can do in the microwave; I suggest heating it up in increments of 5 seconds to not overheat it). Roughly mix with a spoon.
- Once the ingredients are roughly mixed, with some flour likely remaining unmixed in the bowl, start working the dough with your hand(s). Keep incorporating the remaining flour into the dough while working it. After about 10 minutes the dough should be springy and smooth. At that point, form the dough into a ball. Take 1/4 tsp of olive oil, spread it on your palms, and lightly touch the dough ball. The point is to give it a light covering of fat so that it doesn't dry out. Cover the bowl with a cloth and put it in a warm spot where it will rise for the next 60 minutes.
- Line a sheet pan with parchment paper. Put the dough on a flat surface (a large cutting board should be enough) and work it for about 1-2 minutes. If the dough is sticky, add flour (but only if it's so sticky that you cannot comfortably form a ball out of it). Form a ball and divide it into 8 pieces -- I just cut it with a knife. Out of the 8 pieces, form 8 rolls, putting each on the sheet pan. This is the time when you should think what shape your rolls should have; for example, for sandwiches it's a good idea to flatten them somewhat.
- The rolls will be given some more time to rise, and since they will be covered with a cloth, I like to put something on the pan so that the cloth does not lie directly on the rolls (which stymies their growth). To this end, I often use a couple of small glasses. Put the sheet pan in a warm place and let the rolls rise for 20 minutes.
- After that time set the oven to 230 degrees Celsius or 450 degrees Fahrenheit, and let the rolls continue to rise until the oven reaches that temperature. Boil about 2 cups of water.
- Use a sharp knife to make a cut or use a spatula to make a dent across each roll, sprinkle some flour over them, and put them in the oven. Pour the boiled water into a baking dish and also place it in the oven, preferably below the rolls. (This is not necessary, but it will make the surface of the rolls more crispy.)
- The rolls should take about 12-15 minutes to bake. I like the rolls nicely browned.
- Once they're ready, take the sheet pan immediately out of the oven and transfer the rolls onto a cooling rack. It's better to let the rolls cool down a bit before slicing, but nobody's going to judge you if you can't wait ;-).